How to Track Kilometres for Care Visits
Step-by-step guide for carers logging trip kilometres in the Teiro app, and for coordinators reviewing and approving travel records.
Overview
Teiro includes built-in kilometre tracking for carers. After a visit, carers log each trip from their phone: they select the trip type, calculate or enter the distance, and optionally attach an odometer photo and evidence. Coordinators review pending trips from a dedicated approvals screen and can approve in batch.
This guide covers the full workflow from the carer's perspective and the coordinator's perspective.
For carers: how to log a trip
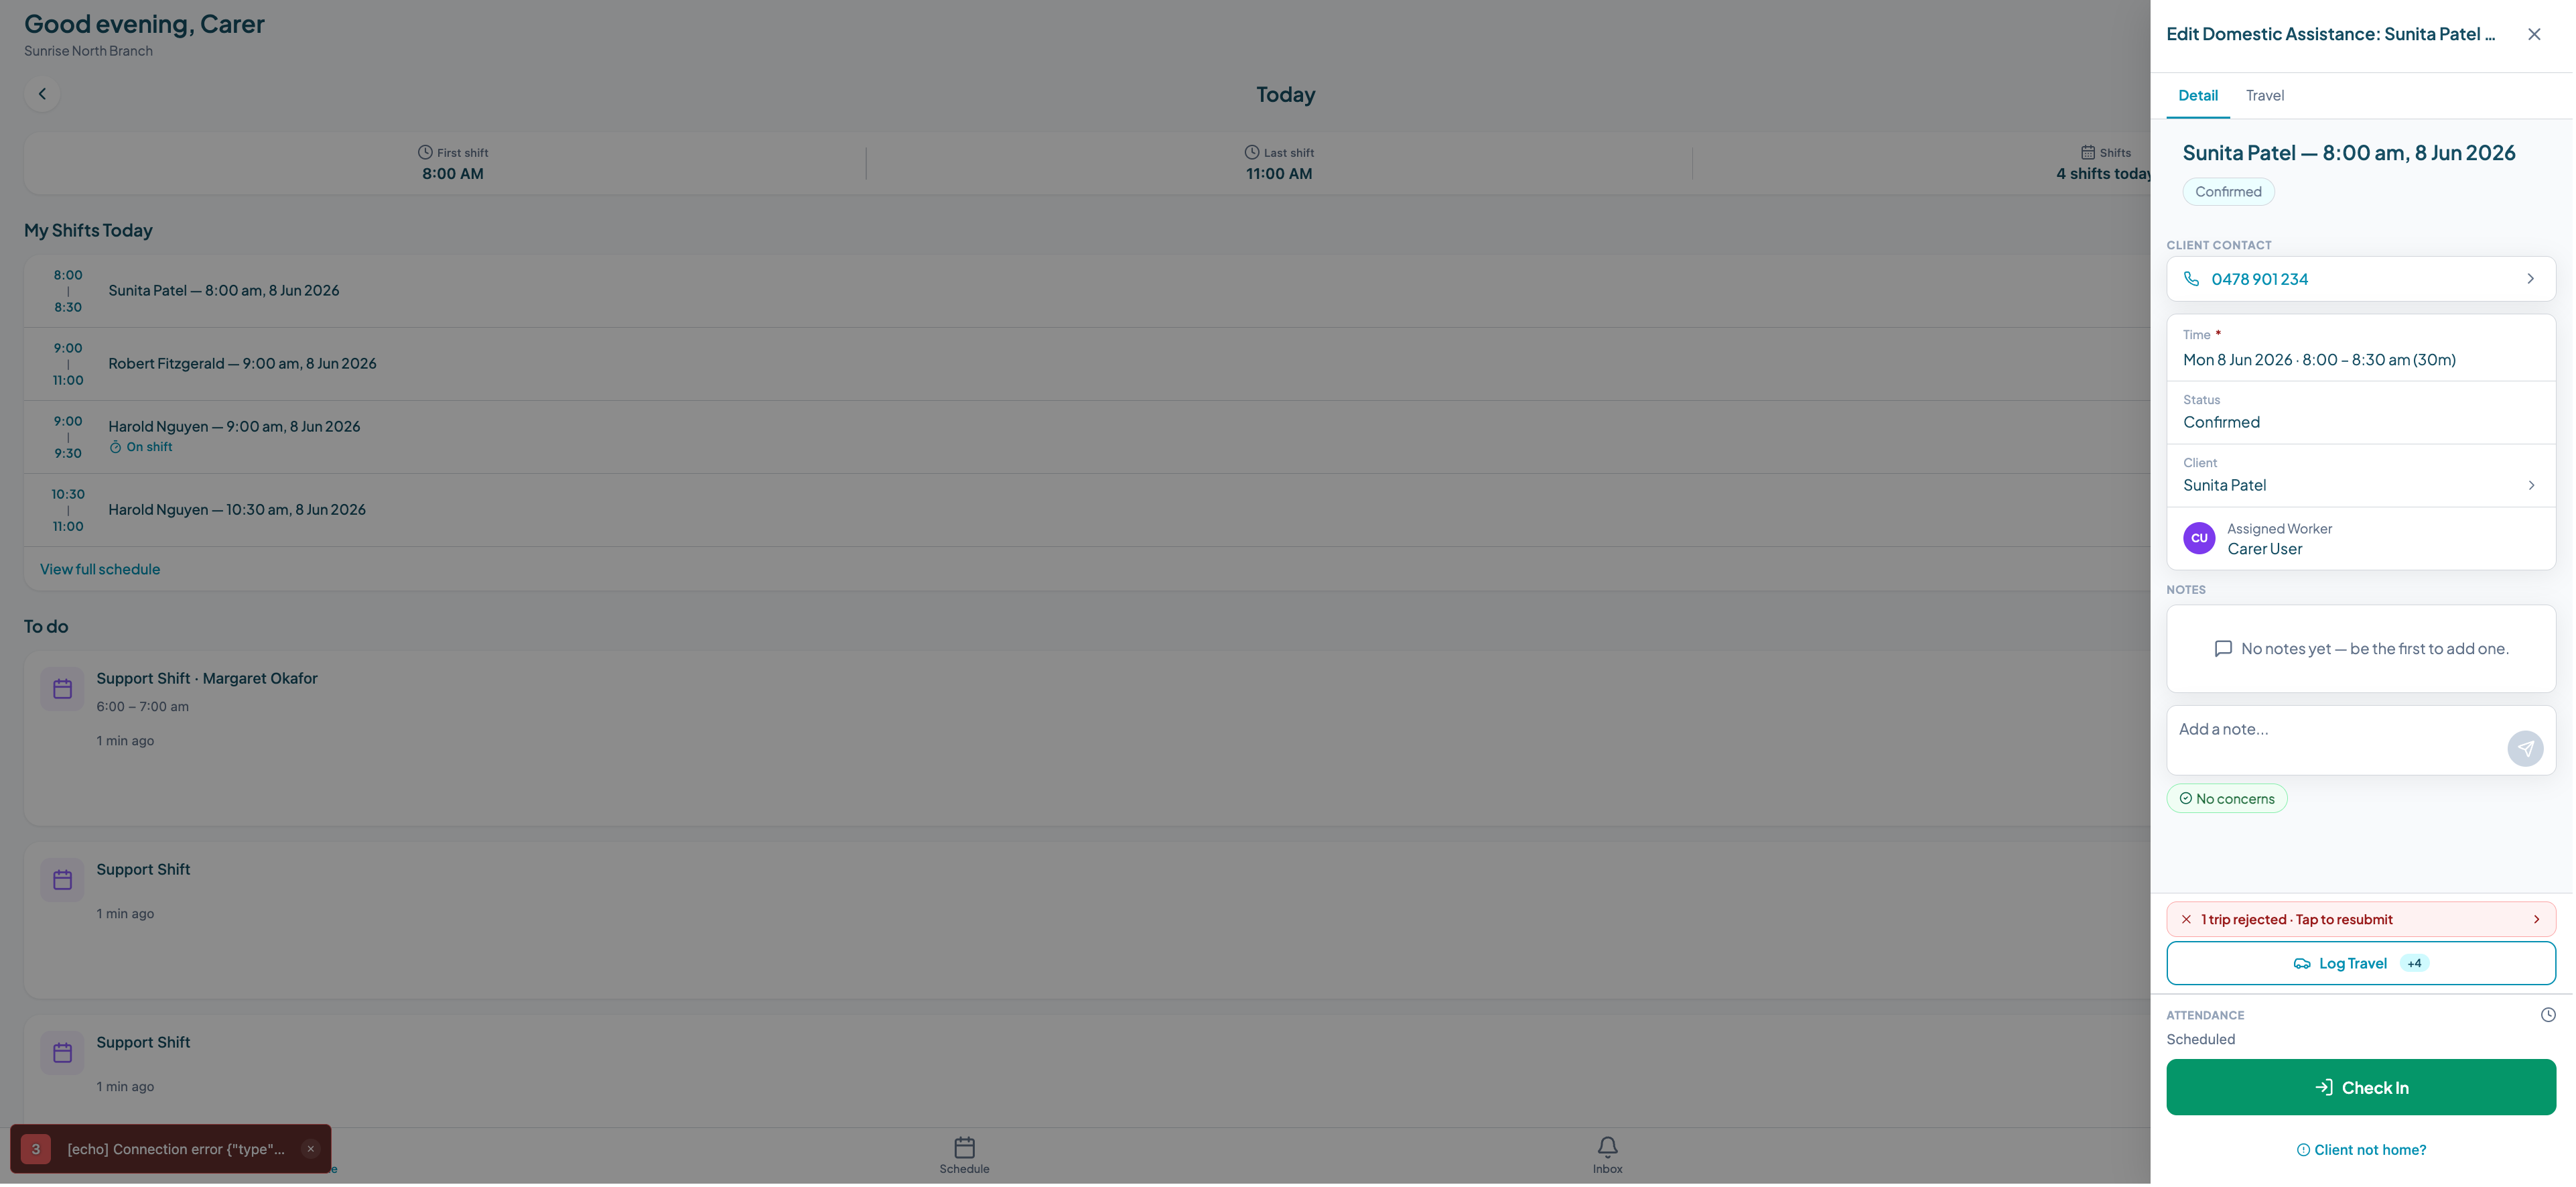
Step 1: Open the visit record and tap Log Travel
After completing a visit, open the visit record in the Teiro app. At the bottom of the screen, you will see the Log Travel button in the footer action bar. Tap it.
You can log travel any time before the shift closes. You do not need to do it the moment you leave the client. Most carers log it while still parked.
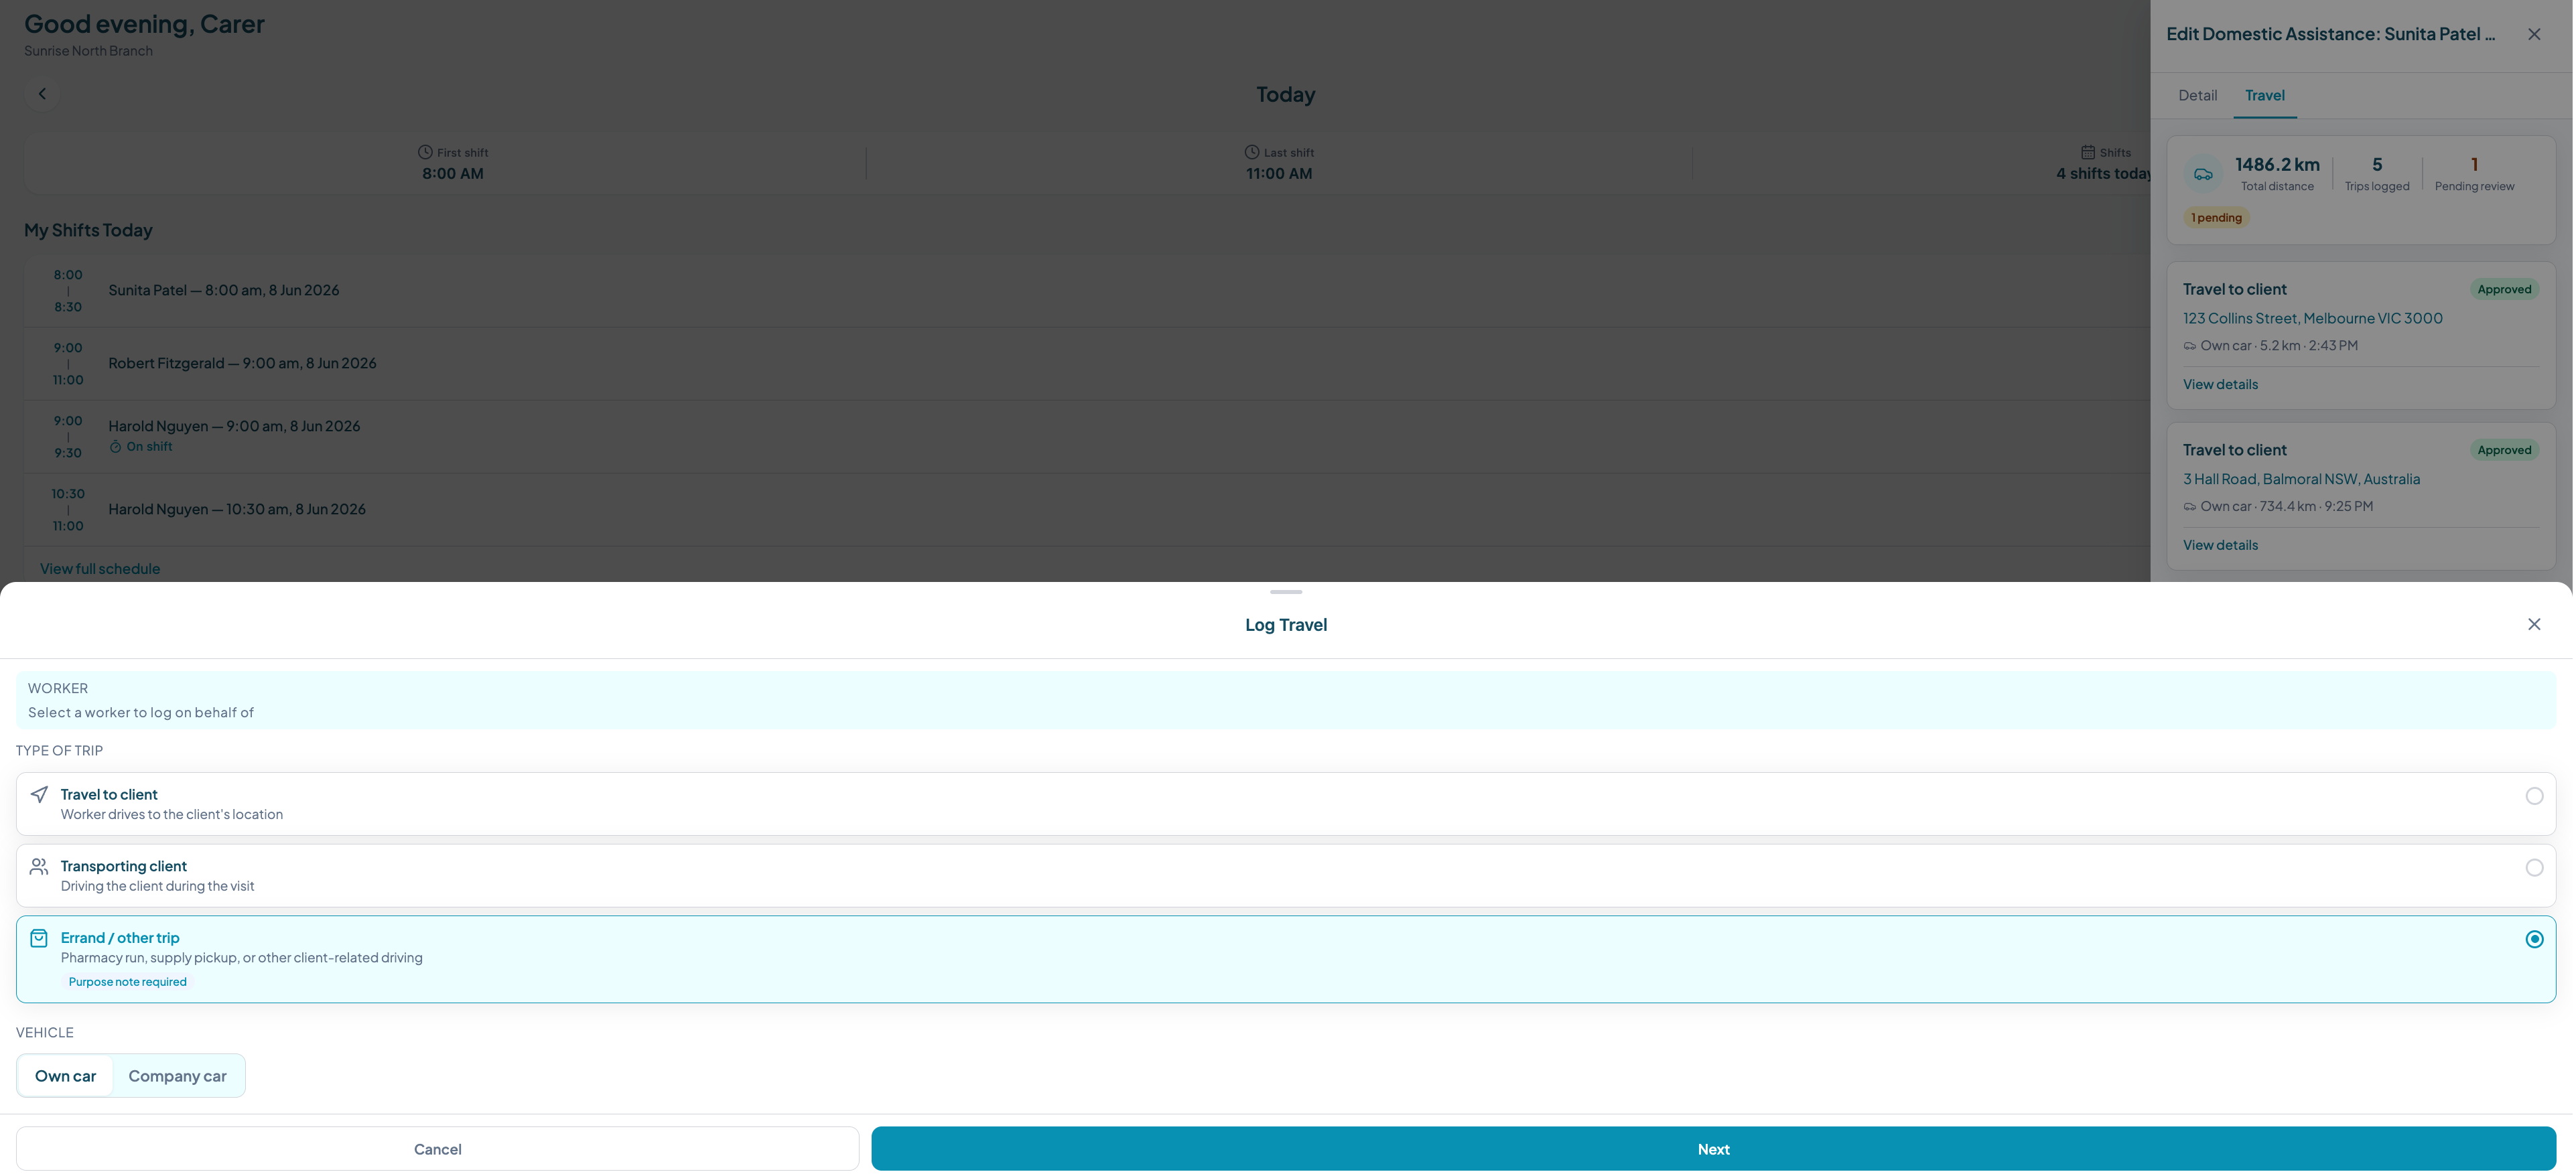
Step 2: Select the trip type
A sheet slides up with three trip type options. Tap the one that matches your trip.
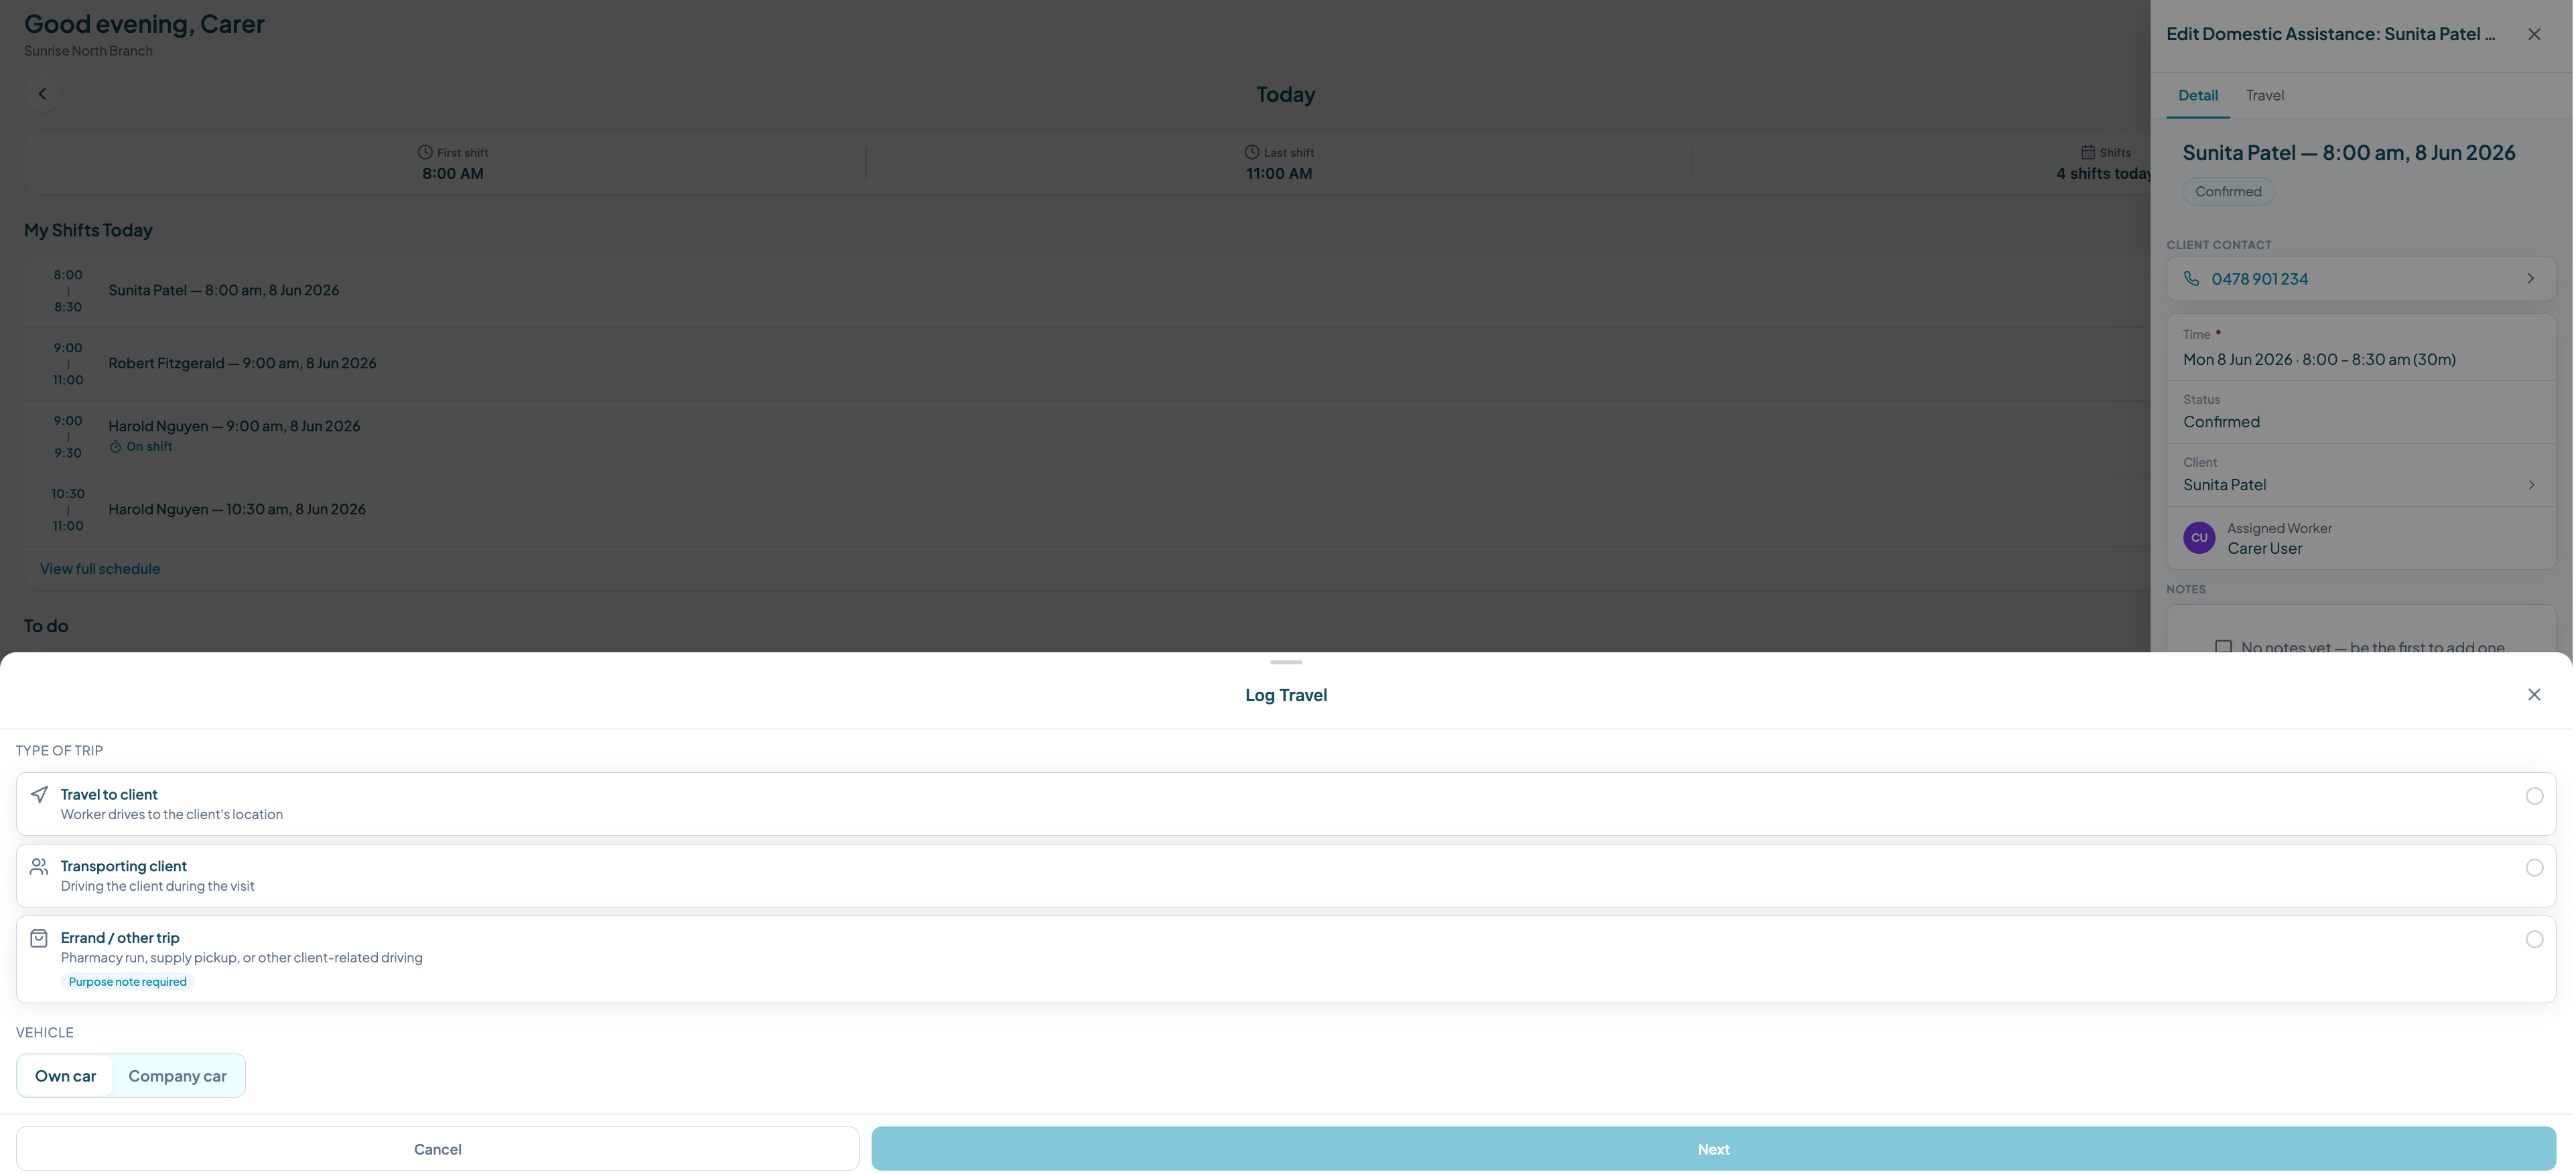
Trip types explained:
- Travel to client: you are travelling to reach the participant's home or support location. Use this for any trip where you are getting yourself to the client.
- Transporting client: the participant is in your vehicle. Use this for community access trips, medical appointments, or any trip where you are driving the client.
- Errand/other trip: you are running an errand on behalf of the participant and they are not in the vehicle. Shopping, pharmacy runs, and similar tasks fall under this type.
Different trip types are treated differently for NDIS claiming purposes and may map to different support items depending on the participant's plan and agreement. When transporting a participant, kilometres are generally claimed against the participant's Core: Transport budget, not as provider travel. For errand trips on a participant's behalf without the participant in the vehicle, check the participant's plan and your enterprise agreement before claiming. Select the most accurate description.
Step 3: Enter the distance
The distance step shows two address fields: From and To. Your current GPS location pre-fills the From field.
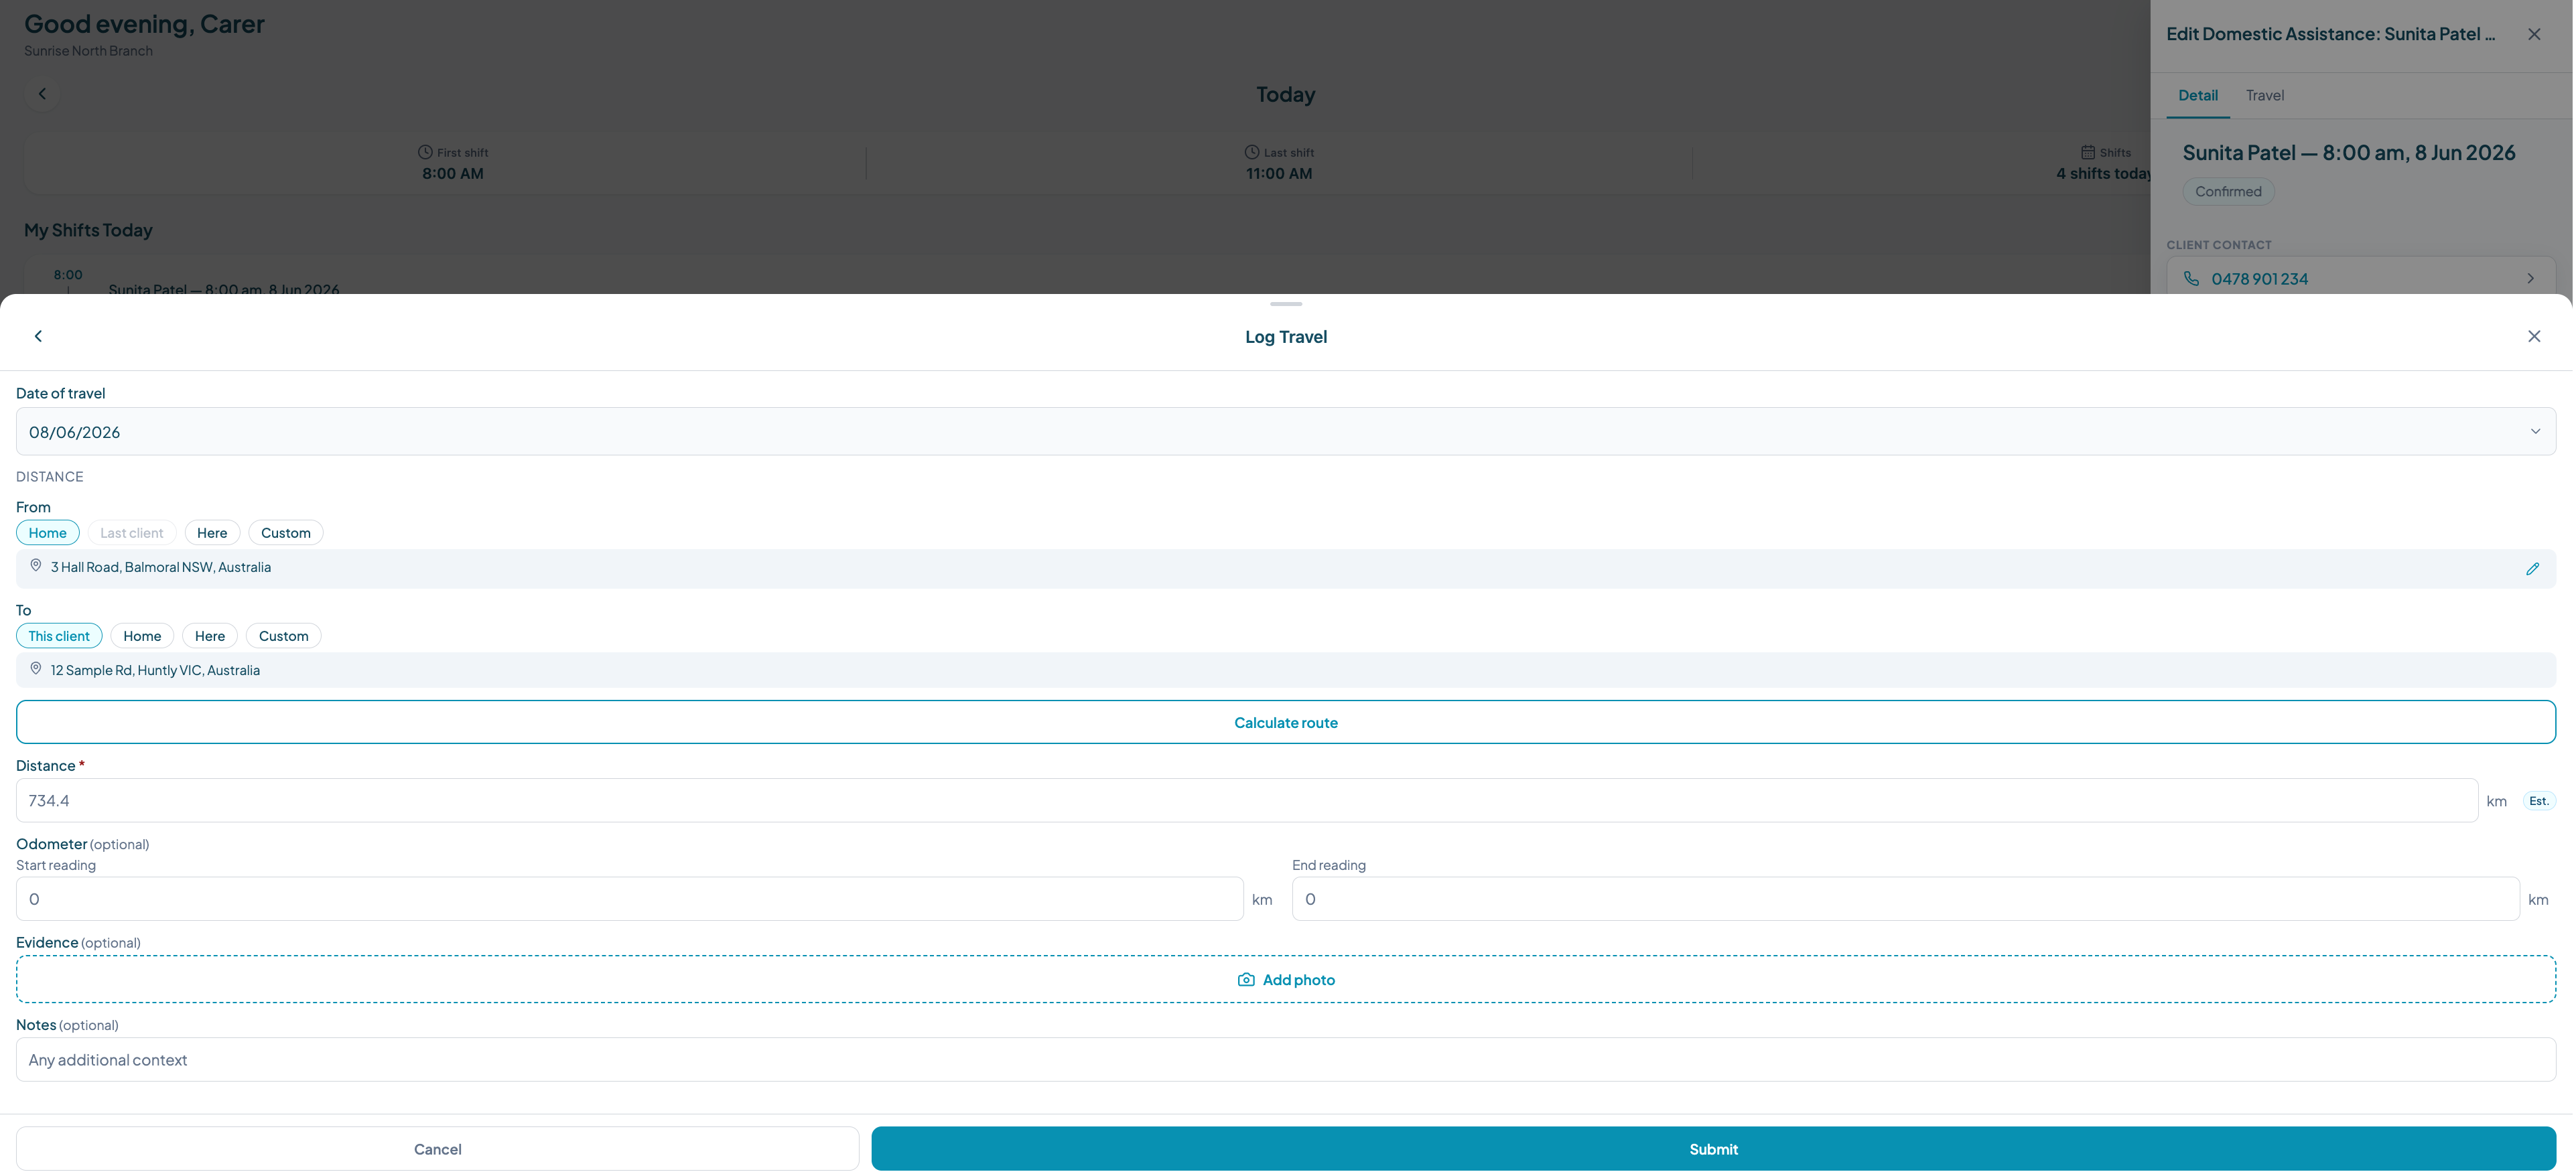
You have three options for entering the distance:
- 1.Calculate route: enter the destination address and tap Calculate route. Teiro uses your GPS location and the destination to calculate the driving distance. The distance field is editable if the route does not match what you actually drove.
- 2.Type an address: type the destination manually. Saved addresses from previous trips appear as suggestions.
- 3.Enter distance directly: tap the distance field and type the kilometres if you already know it.
Odometer photo (optional): Tap the odometer photo field to photograph your odometer reading. This is optional but recommended for compliance.
Evidence upload (optional): Tap the evidence field to attach a photo of a receipt, parking docket, or any other documentation for the trip.
Step 4: Submit the trip
Review the details and tap Submit. The trip is saved as Pending and sent to your coordinator for approval.
You will be able to see the trip on the Travel tab of the visit record. The status will show as Pending until your coordinator approves it.
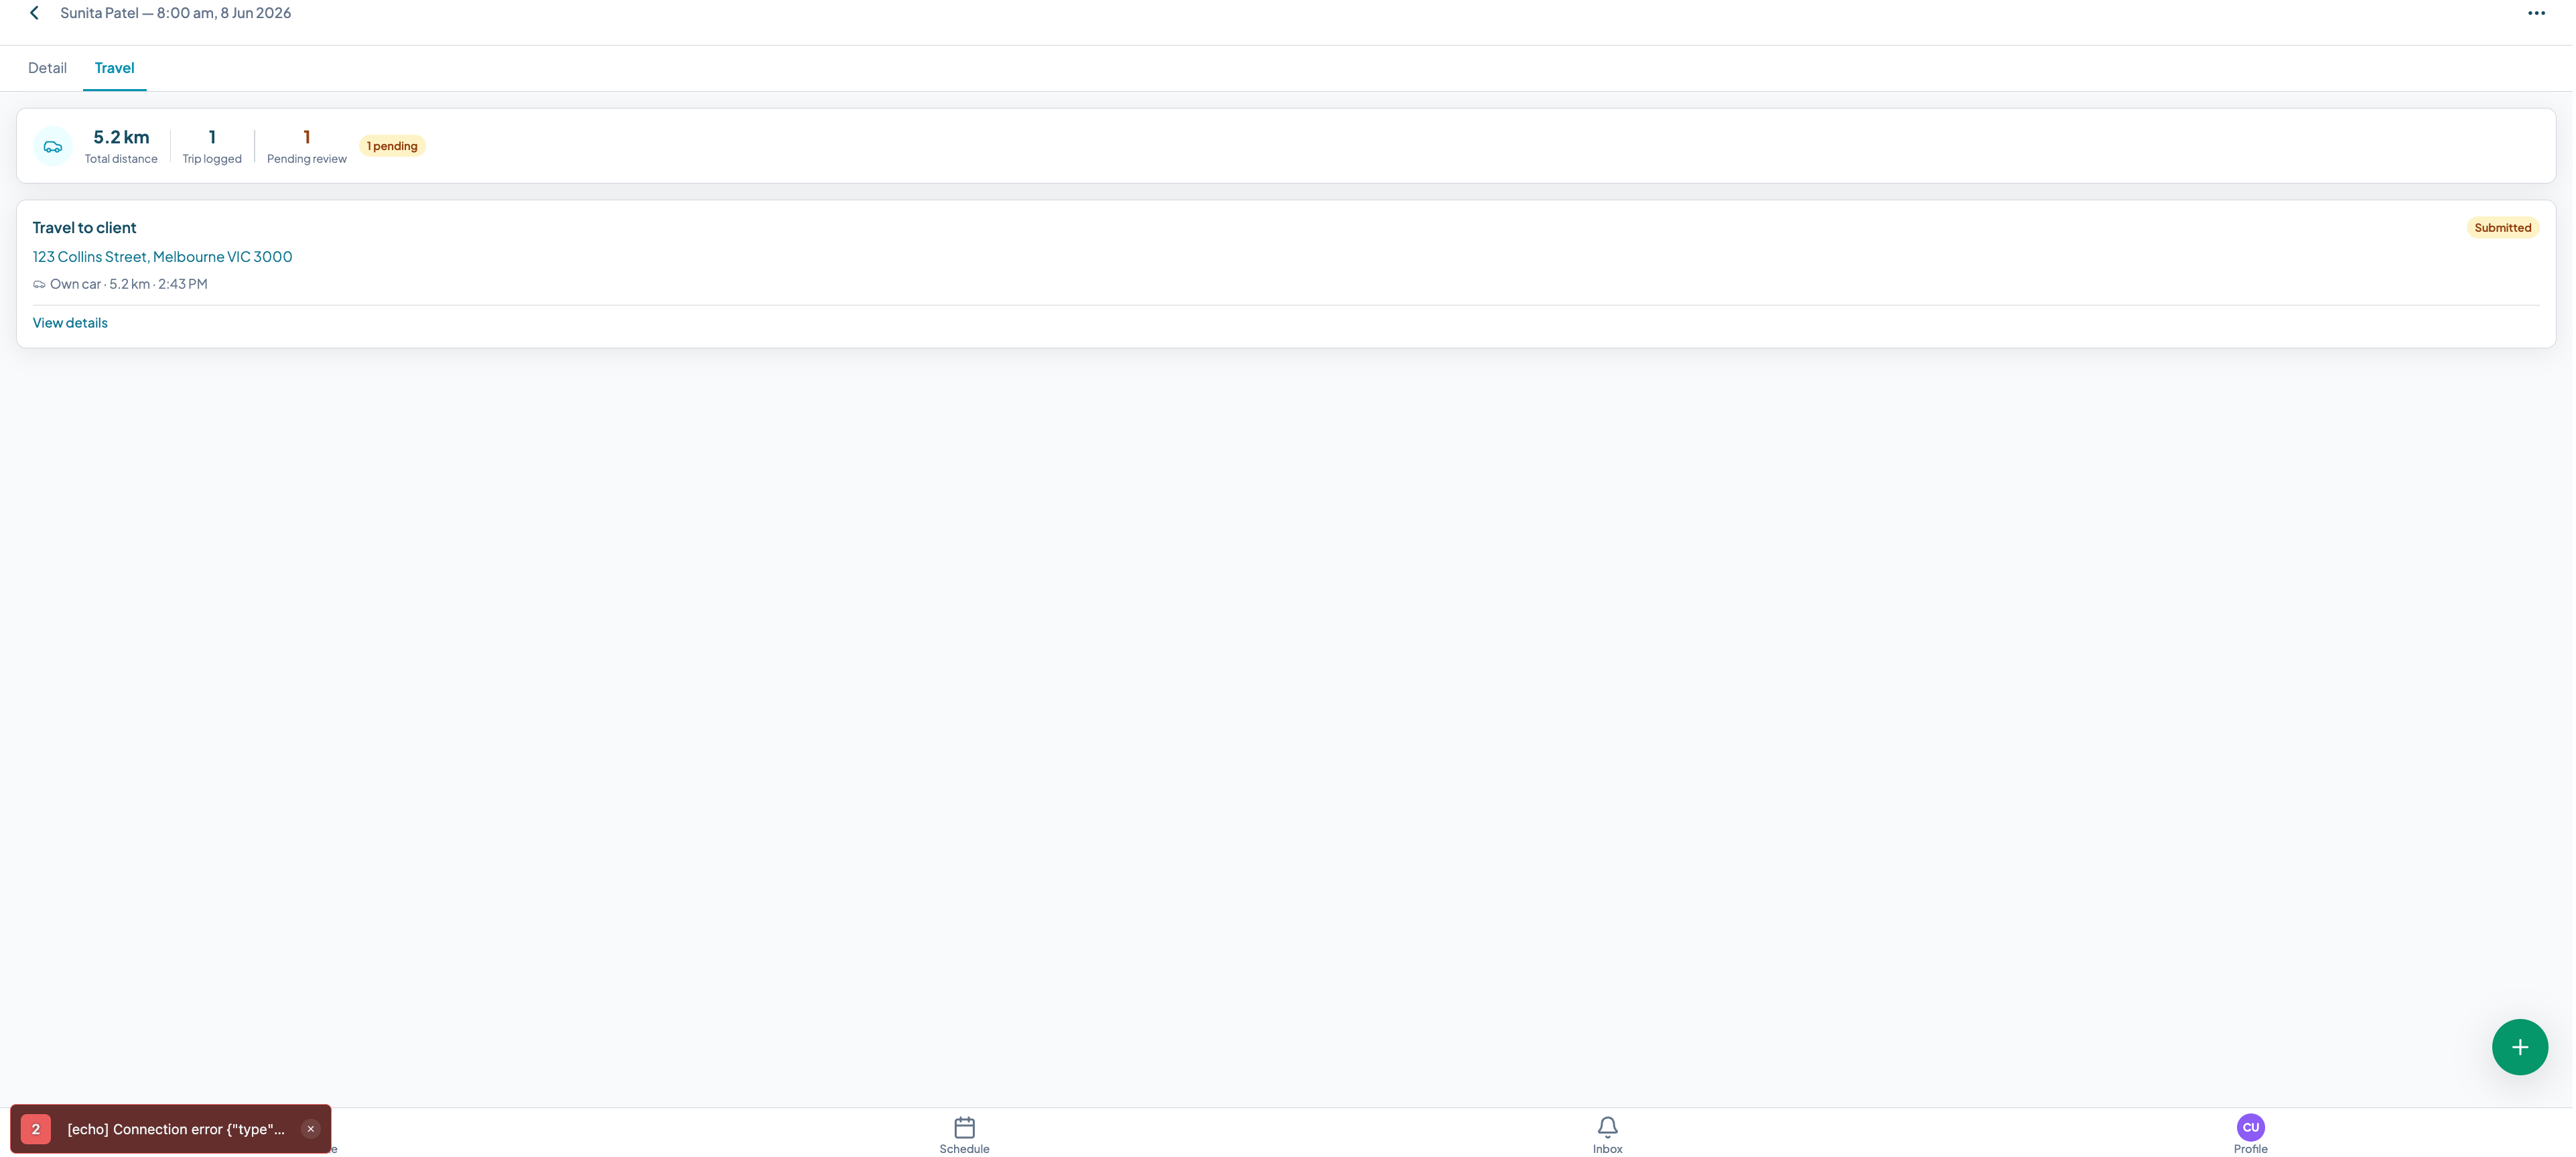
Viewing your trip history
Every visit record has a Travel tab showing all logged trips, the total kilometres, the trip count, and the status of each trip.

To see the full details of a specific trip, tap it in the list.
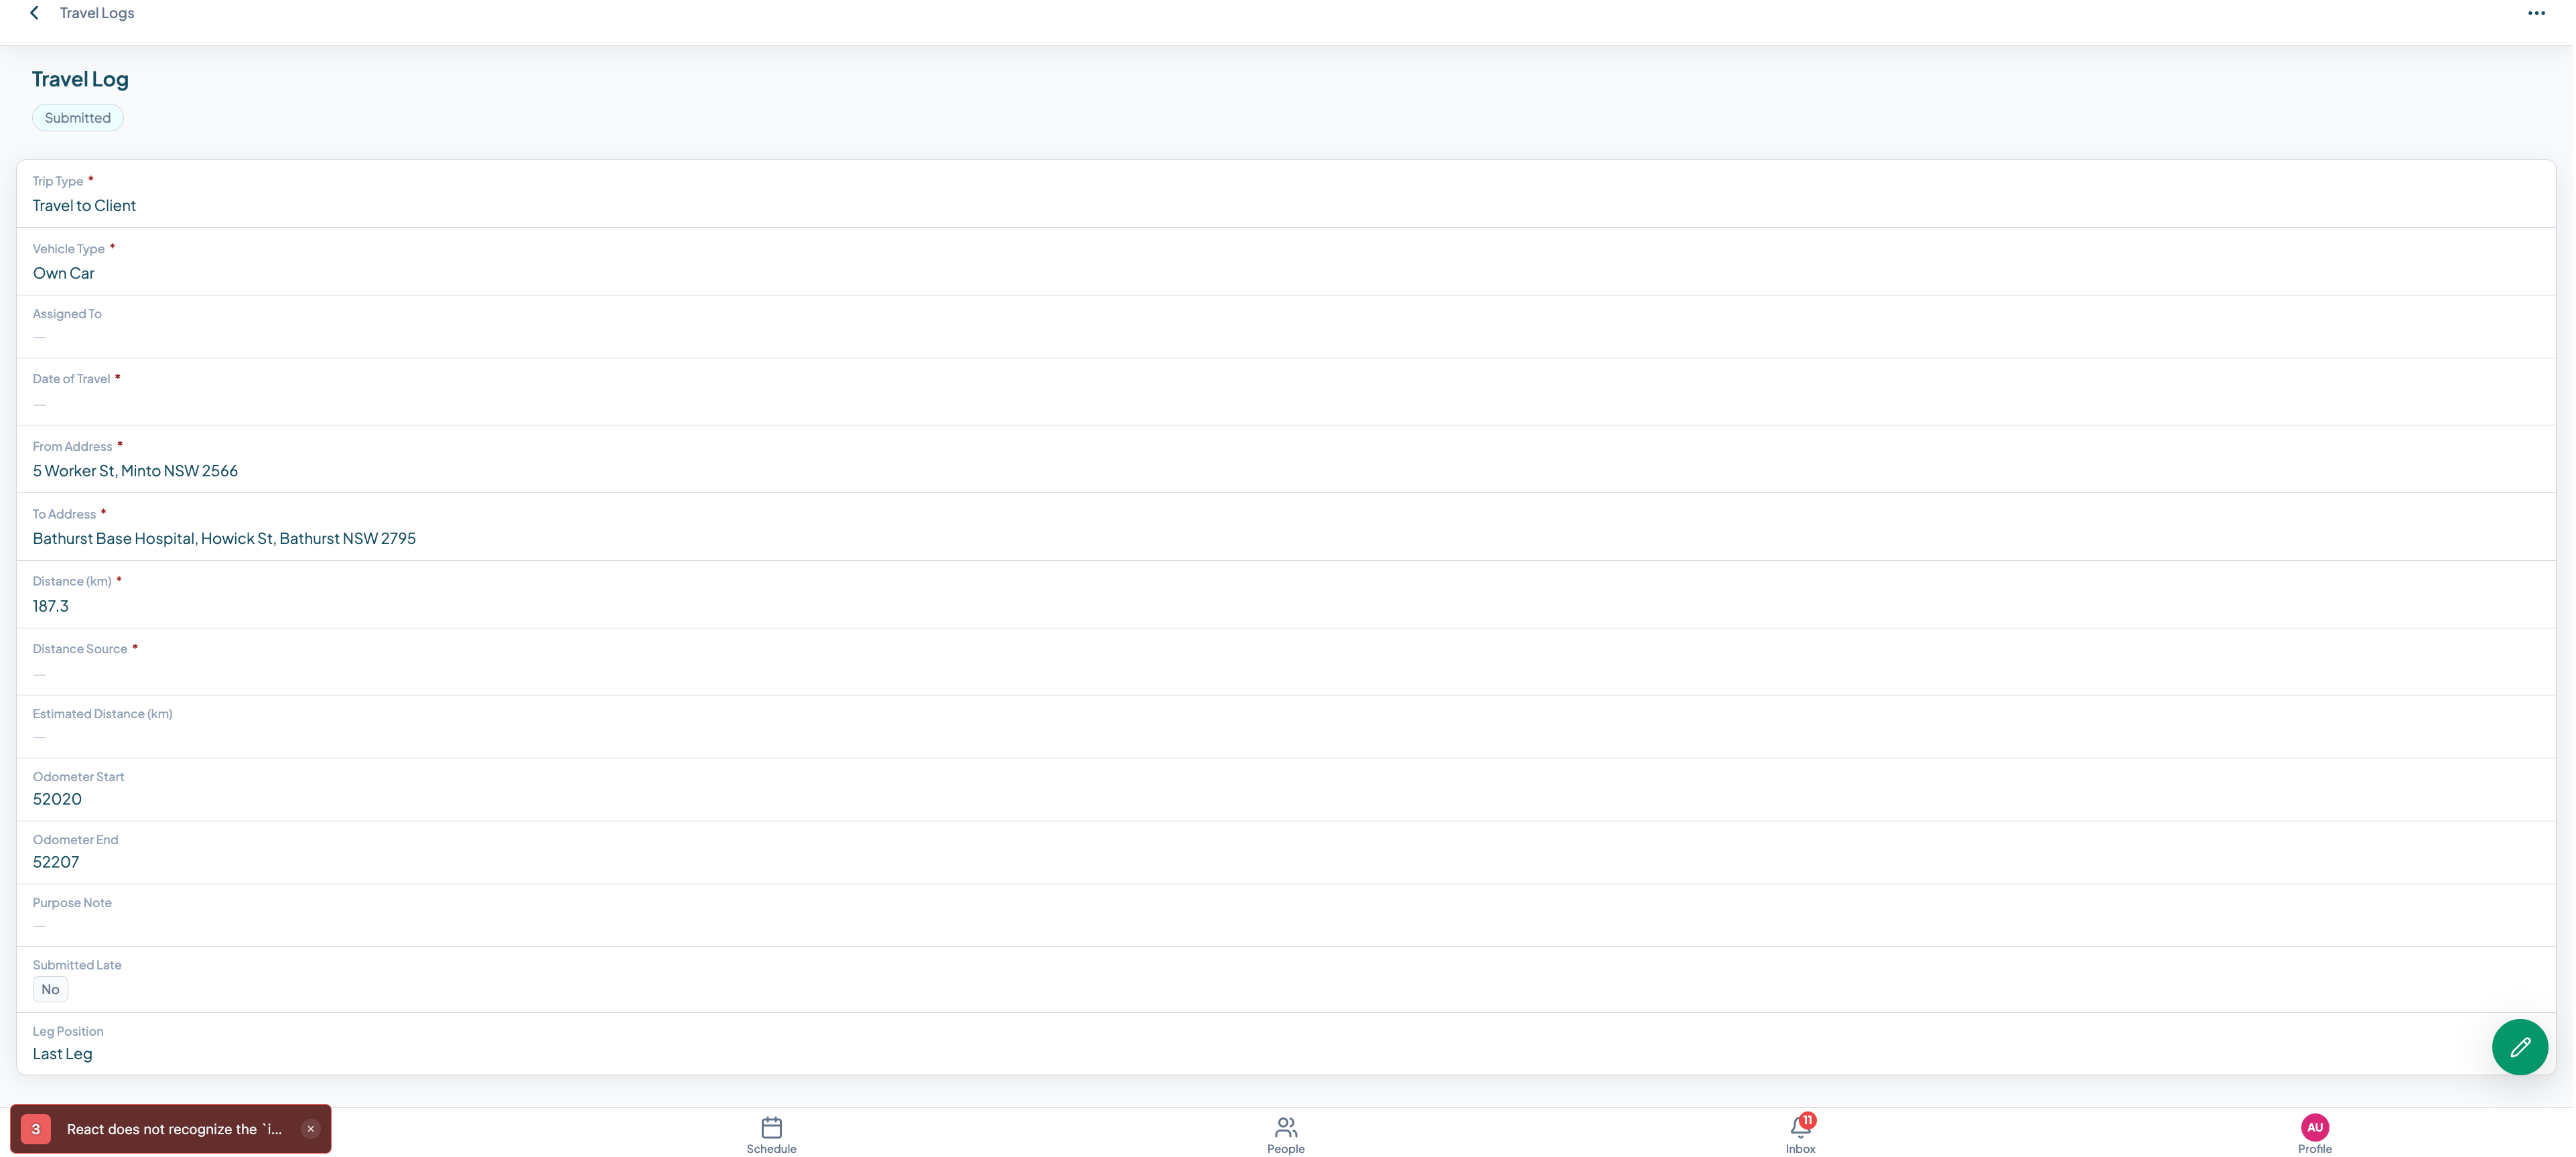
The trip detail view shows: - Trip type - From and to addresses - Distance - Date and time logged - Odometer photo (if captured) - Evidence (if uploaded) - Approval status and who approved it
For coordinators: reviewing and approving trips
The approvals screen
As a coordinator, you can see all pending kilometre trips from the approvals section. Trips are grouped by worker so you can review one worker's travel at a time.

Each trip shows the trip type, addresses, distance, and date. Tap a trip to see the full detail including any odometer photo or evidence before approving.
Approving trips individually
Tap the Approve button next to any trip to approve it. The trip status changes to Approved and the carer is notified.
Batch approval
To approve multiple trips at once, tap Select to enter batch selection mode. Check the trips you want to approve, then tap Approve selected.
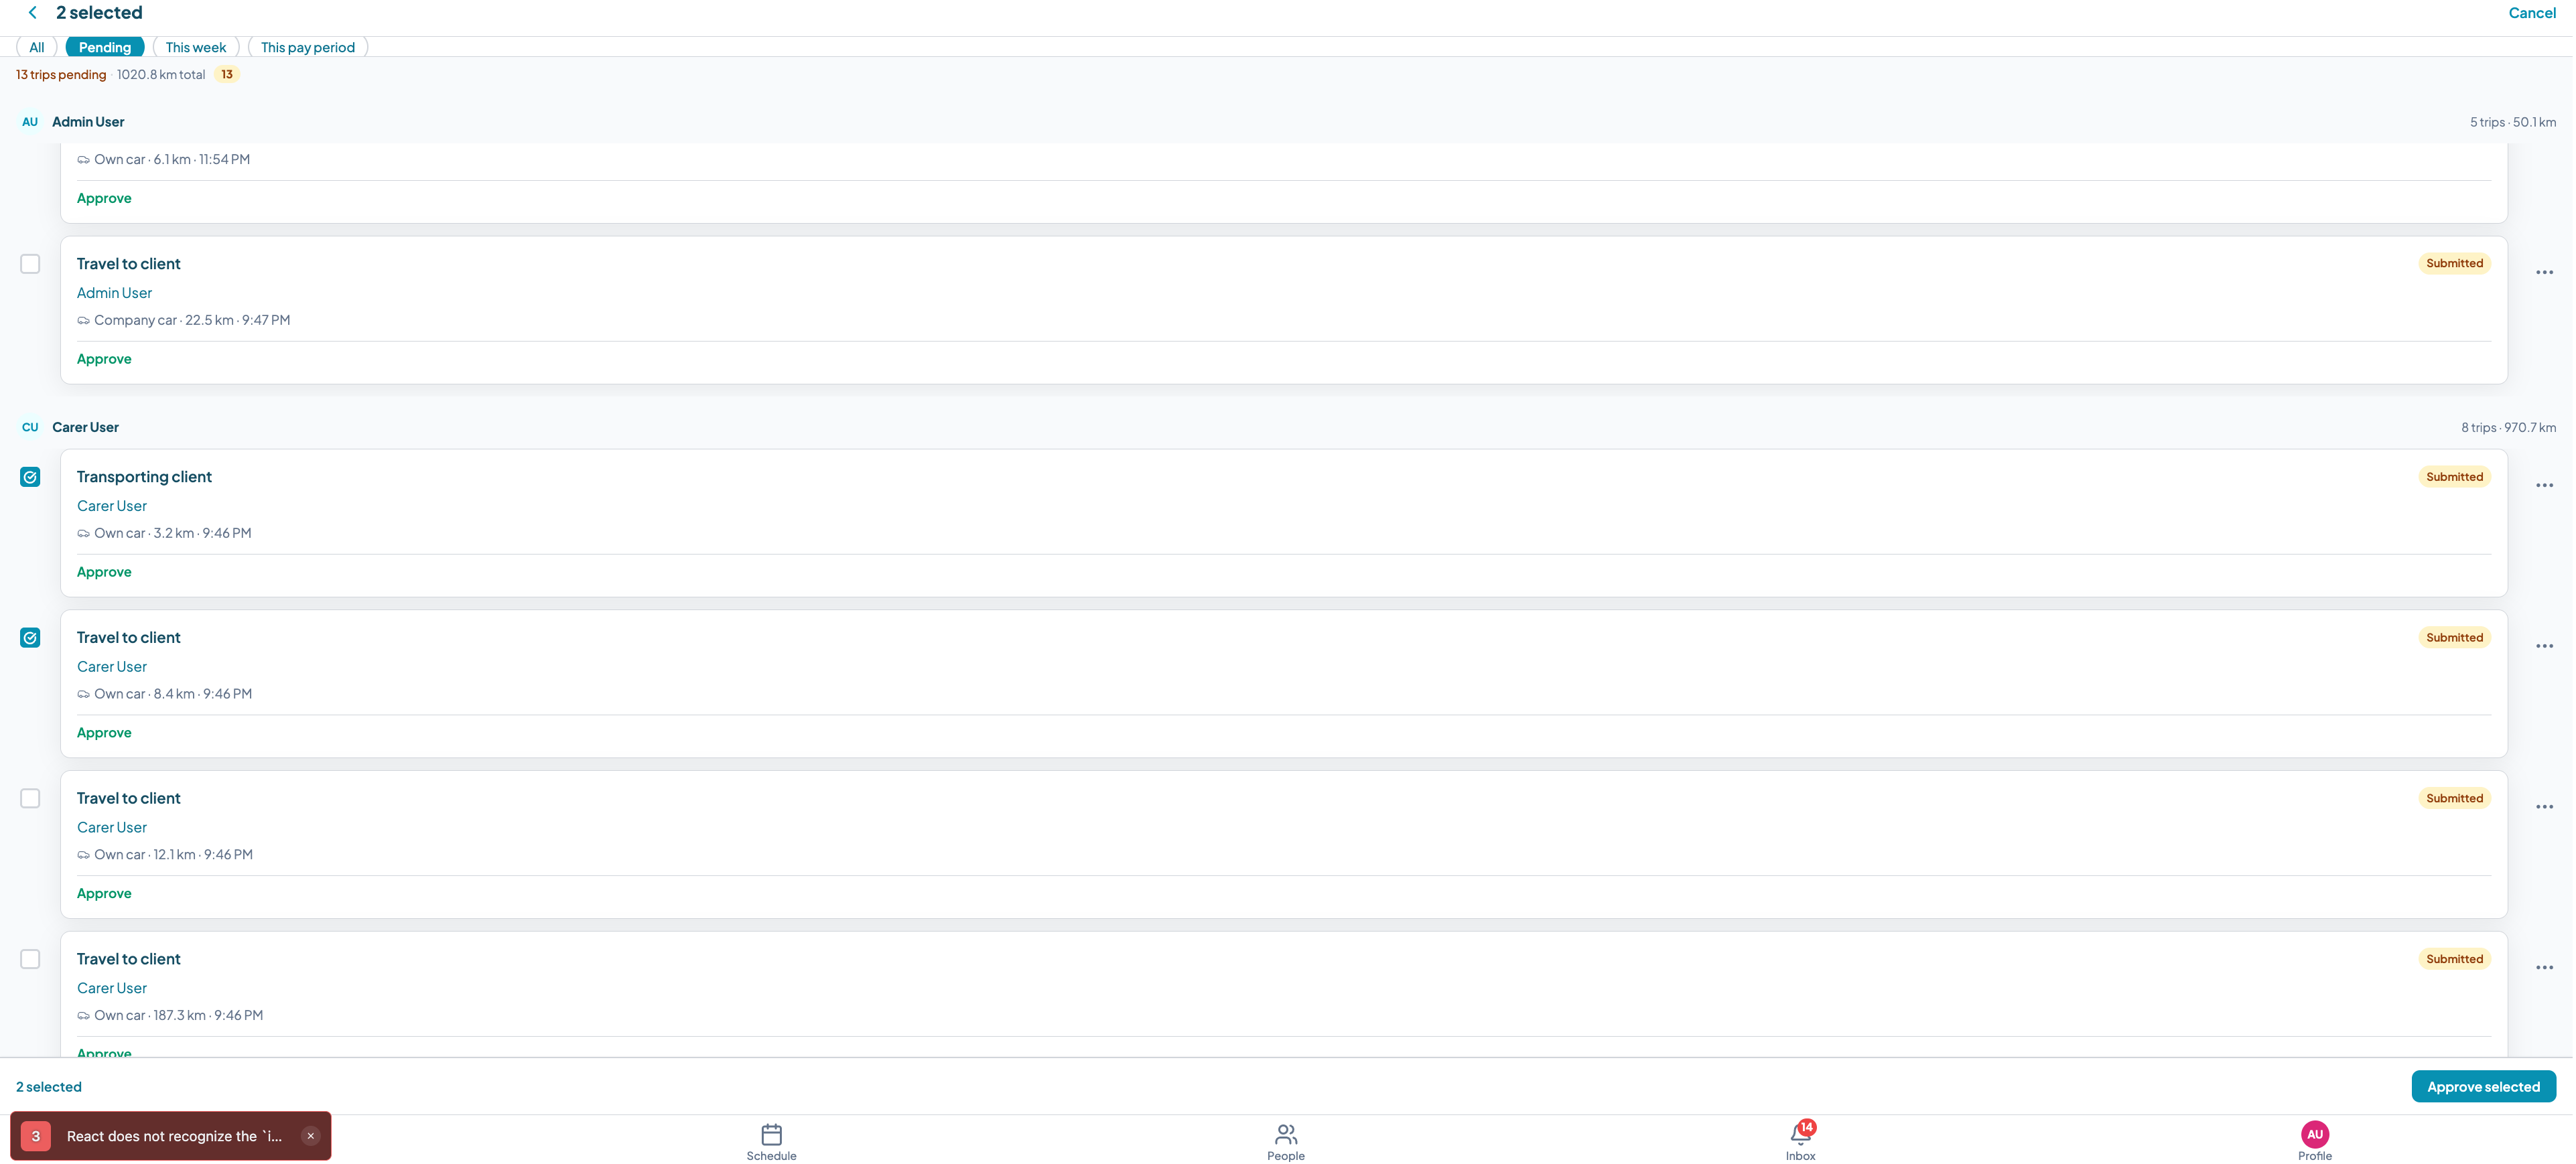
Batch approval is the most efficient approach at the end of a pay period when you are processing a full fortnight of travel records for multiple workers.
After approval
Once approved, a trip: - Changes status from Pending to Approved - Is locked from editing by the carer - Is included in the total kilometre count on the Travel tab - Records who approved it and when
The approval record is the audit trail. It shows the coordinator's name, the approval timestamp, and the trip details at the time of approval.
Errand trips
Errand trips follow the same logging flow. Select Errand/other trip as the trip type, enter the details, and submit.
Errand trips are relevant for shopping, pharmacy runs, or any community access errand where the participant is not in the vehicle. They appear on the Travel tab alongside other trip types.
Note: Errands on a participant's behalf without the participant in the vehicle have different claiming rules under both NDIS and SCHADS. Check your participant's plan and your enterprise agreement before claiming errand trips.
Approved trip view
Once a trip is approved, the full record is visible with the approval status prominently shown.
Frequently asked questions
Can I log travel after leaving the client's house? Yes. You can log a trip any time before the shift closes. Most carers log it while still parked, but there is no hard time limit during the shift window. If you forget, you can still log it when you get home or later that day.
Does Teiro use GPS automatically? The Calculate route button uses your current GPS location as the starting point and calculates the driving distance to your destination. If GPS is not available or you drove a different route, you can edit the distance field or enter it manually. Manual entry is equally valid for approval purposes.
What is the difference between the three trip types? Travel to client is for getting yourself to the participant. Transporting client is for any trip where the participant is in your vehicle. Note that these kilometres are generally claimed against the participant's Core: Transport budget, not as provider travel. Errand/other trip is for running errands on behalf of the participant without them in the vehicle. Check your participant's plan and enterprise agreement before claiming these. Different trip types are treated differently for NDIS claiming purposes and may map to different support items depending on the participant's plan and agreement, so selecting the correct type matters.
Can coordinators bulk approve? Yes. From the approvals screen, coordinators can enter batch selection mode, check multiple trips, and tap Approve selected to approve them all at once. This is the standard workflow for end-of-fortnight payroll processing.
Is odometer recording required? Odometer capture is optional in Teiro. Whether your organisation requires it depends on your internal policy and the conditions of your NDIS service agreements. It is recommended for any provider that submits regular NDIS travel claims, because odometer readings are the most defensible record if a claim is queried.
Can I attach a receipt to a trip? Yes. Each trip has an evidence upload field. You can attach a photo of a receipt, parking docket, or any documentation relevant to the trip. The file is stored against the trip record and is visible to your coordinator when they review the trip for approval.
What happens when a trip is approved? The trip status changes from Pending to Approved. It is included in the total kilometre count on the Travel tab and is locked from further editing. The approval record shows who approved it and when. For NDIS billing purposes, approved trip data is available for export and claim preparation.
Next steps
- How to Set Up Your Team and Rosters: get your workers and first roster configured
- Using the Scheduler Board: manage shifts and assignments from the coordinator view
Ready to see kilometre tracking in action? Book a demo or sign up free to try it with your team.