How to Set Up Your Team and Rosters in Teiro
A step-by-step guide for new Teiro users: adding your support workers, building your first roster, assigning shifts, and publishing your schedule.
Overview
There are two things you need to get in place before Teiro becomes useful day-to-day: your team and your schedule. This guide walks through both, in order.
By the end of it, you will have your support workers added to Teiro, at least one shift or visit on the scheduler board, and a published roster that workers can see on their phones. For most organisations, this takes between 30 and 90 minutes depending on team size.
You do not need to enter every worker or every shift before the system is useful. Get a few workers in, build one week of shifts, and you will quickly see how the rest fits together.
Step 1: Add your support workers
Go to the People tab in the bottom navigation. This is where all of your workers live. When you first sign up, it will be empty.
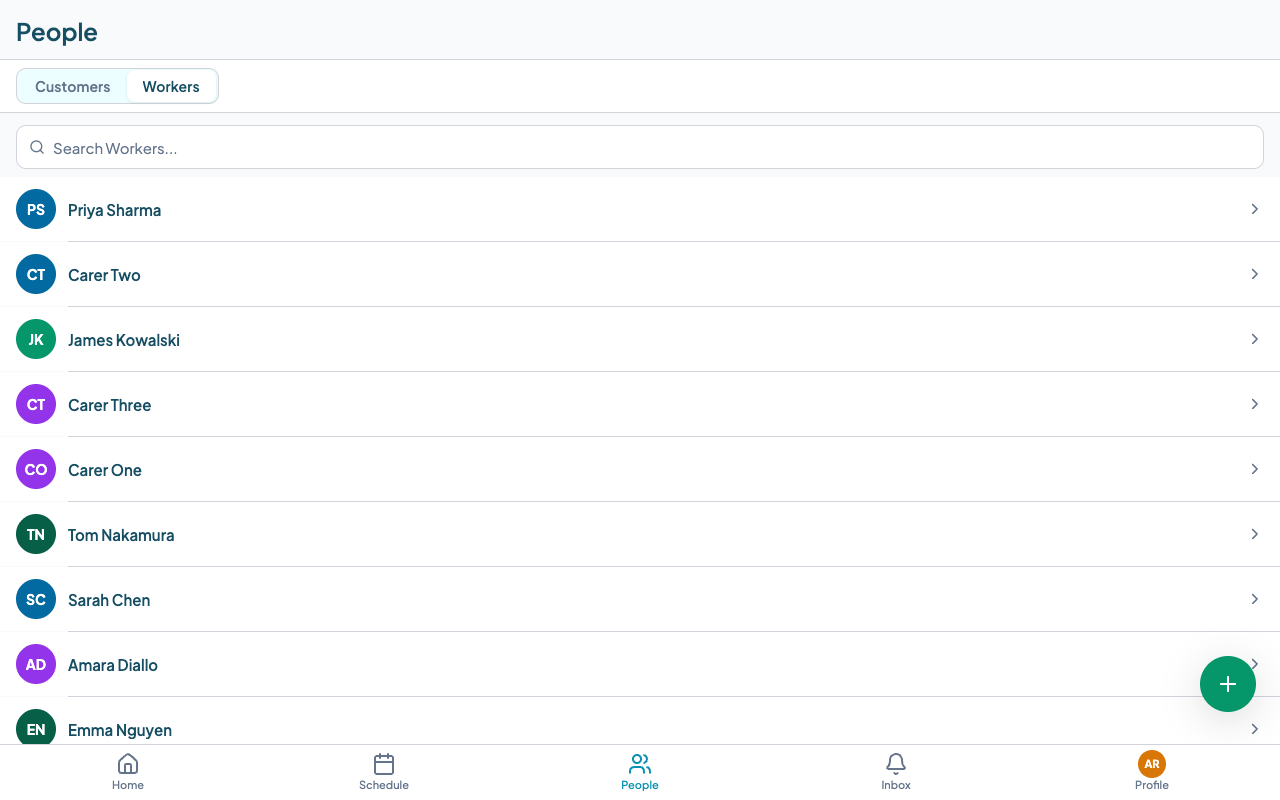
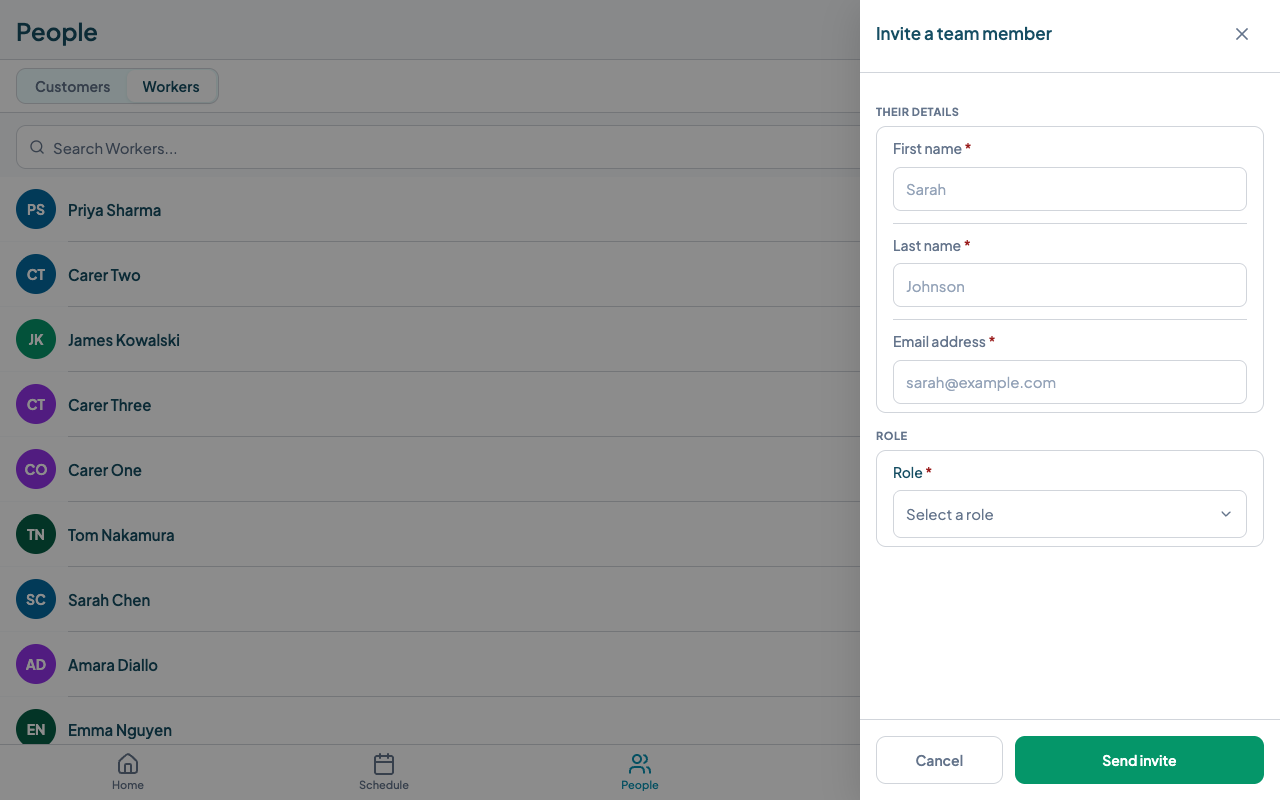
To add a worker, tap the + button in the bottom right corner of the screen. A panel opens asking for the worker's first name, last name, email address, and role.
The role you select determines what the worker can see and do in Teiro. The four most common roles are:
- Carer -- for support workers who carry out shifts. They can see their own roster, check in and out, and write shift notes. They cannot see other workers' rosters or access scheduling tools.
- Coordinator -- for staff who manage clients and coordinate support. They have access to client records, the people directory, and can view the scheduler board.
- Scheduler -- for staff whose primary job is building and managing the roster. Full access to the scheduler board, worker profiles, and compliance status.
- Admin -- full access to everything, including organisation settings, qualification types, and user management. Assign this sparingly.
When you tap Send invite, Teiro sends the worker an email with a link to set up their account. They do not need to do anything before you can start building their roster -- you can add shifts for them straight away. The invite just lets them log in and see their schedule.
Add all of your workers before moving on. If you have a large team, you can do this in batches and return to complete the rest later.
The People tab also has a Customers section. If your workers provide support to named clients, add those clients here too -- go to People, tap Customers, then tap +. You will need a customer record in place before you can create a visit tied to a specific client.
Step 2: Complete each worker's profile
Once a worker accepts their invite, their profile is live in Teiro. Before you start rostering them for shifts, take a few minutes to fill in their profile properly. A complete profile makes the scheduler more useful and keeps compliance tracking accurate.
To open a worker's profile, tap their name in the People directory, then tap View Full Profile.
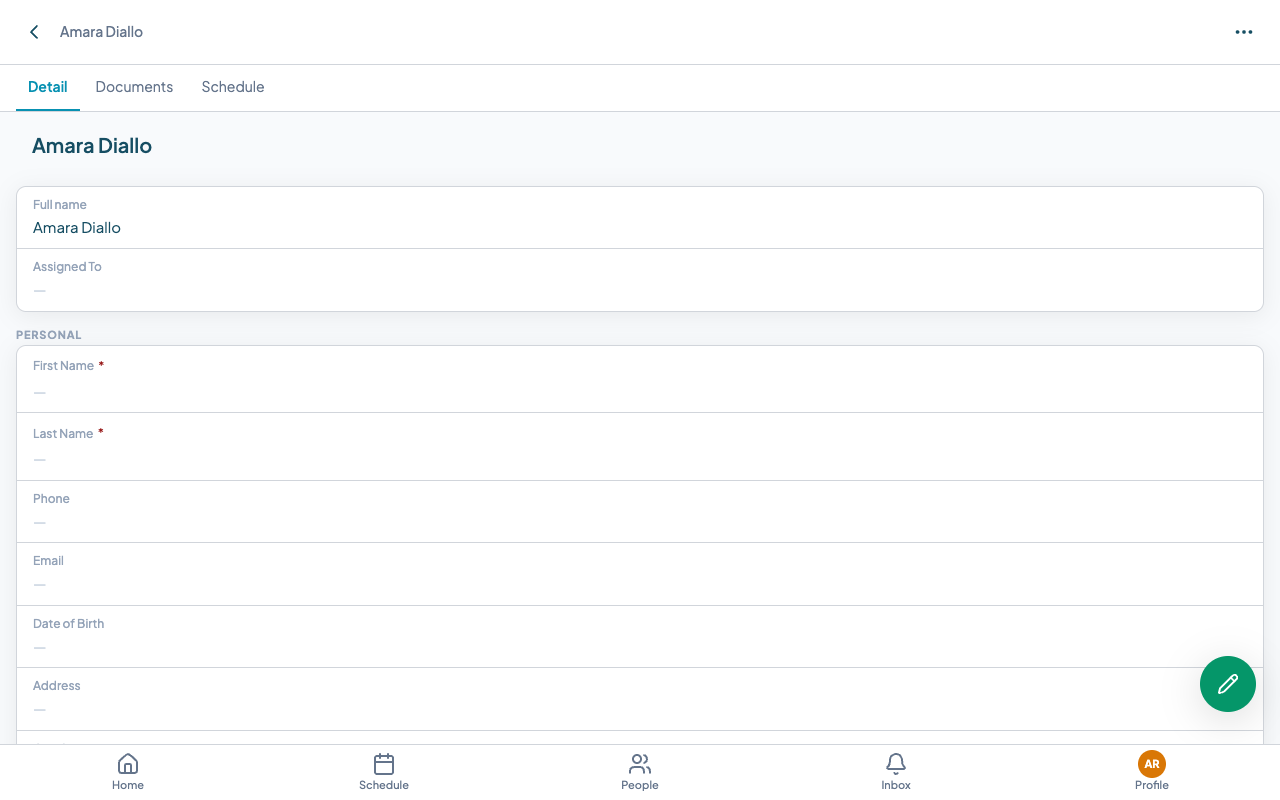
The profile has several sections worth completing at setup:
Personal and contact details. Make sure the worker's mobile number is correct. This is what Teiro uses when you send SMS notifications and roster updates.
Emergency contact. This matters for insurance and incident management. Fill it in now rather than tracking it down later.
Employment. Set whether the worker is full-time, part-time, casual, or a contractor. This affects how their shifts are classified and, if you are using NDIS billing, how their work is reported.
Availability. This is one of the most important sections to complete early. When availability is set, the scheduler board reflects when each worker is actually available, and can warn you when you try to assign a shift outside their available hours. If availability is left blank, the scheduler has no information to check against. Ask workers to set their own availability after logging in, or set it on their behalf from the profile.
Compliance. This section shows a summary of the worker's qualifications: what they hold, what is expiring, and what is missing. You do not need to enter qualifications right now to get started with rostering, but setting them up correctly is important before your first real shifts go live. See Running a qualification compliance report for the full walkthrough.
You do not have to complete every worker's profile in one sitting. Start with availability, since that feeds directly into the scheduler, and come back to the rest.
Step 3: Open the Scheduler
Go to the Schedule tab in the bottom navigation. This is the scheduler board, and it is where you will spend most of your time in Teiro once your team is up and running.
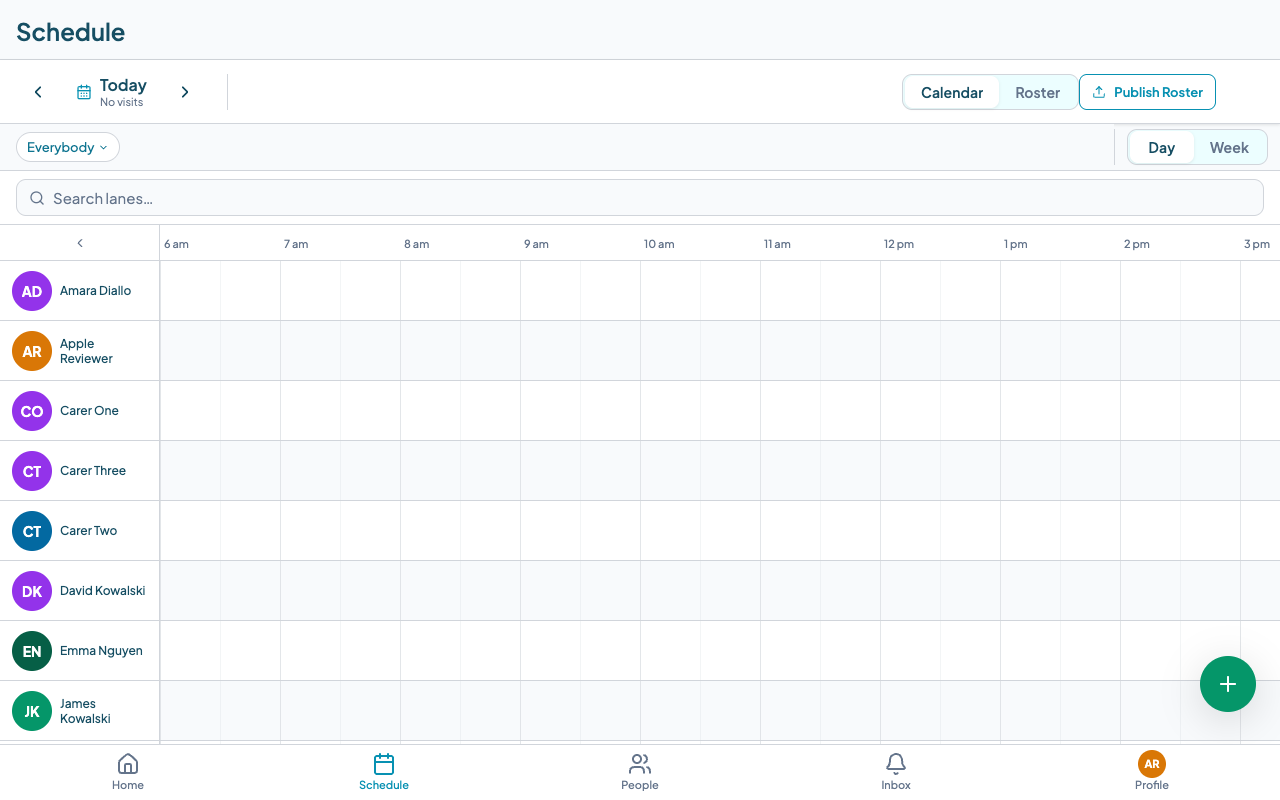
The scheduler board is organised into worker lanes: one horizontal row per worker. Along the top is a timeline, either for a single day or a full week depending on which view you are in. Shift blocks appear on each worker's row at the time they are scheduled.
Use the Day/Week toggle to switch views. Day view gives you a close-up of one day's schedule: useful when you are filling gaps or checking coverage for a specific day. Week view shows the full Monday-to-Sunday spread for every worker, which is how most organisations build their weekly roster.
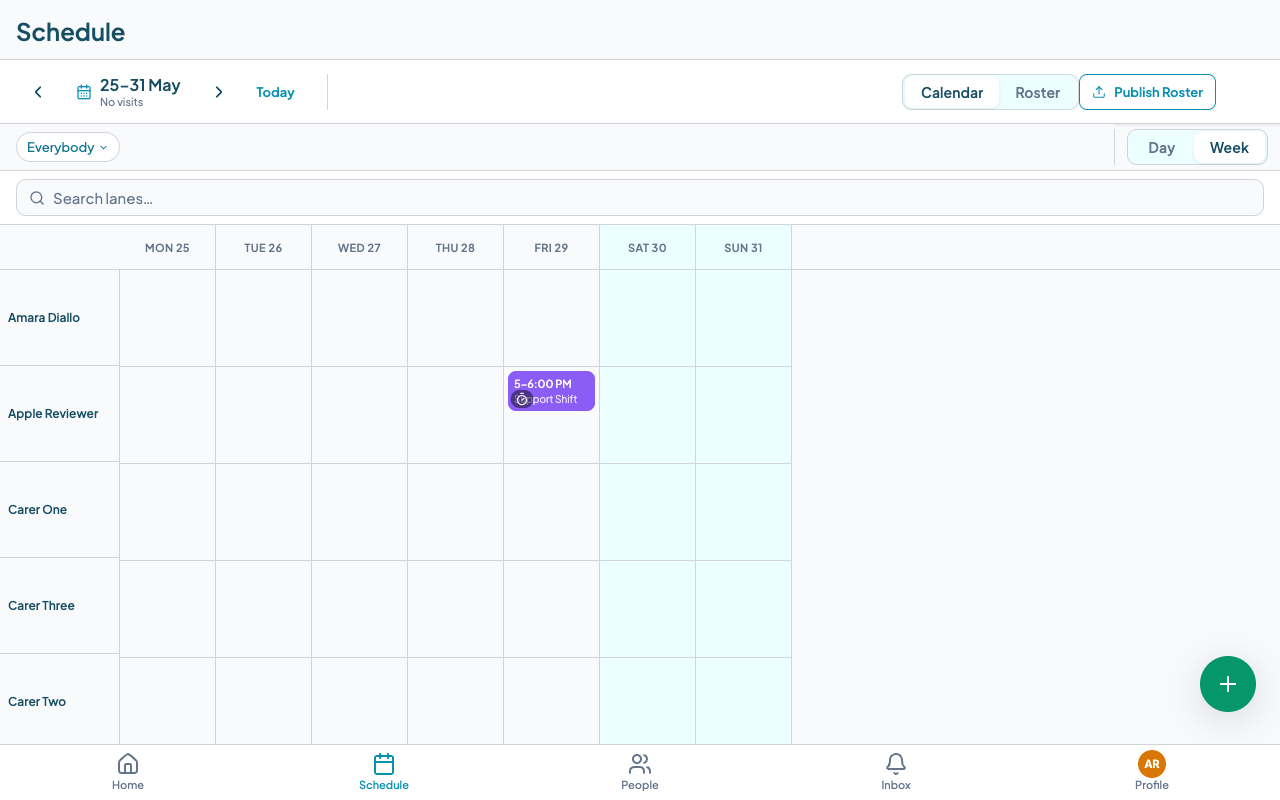
When you first open the scheduler, the board will be empty. That is expected. The next step is to start adding shifts.
Step 4: Create your first visit or shift
To create a shift, tap the + button on the scheduler board, or tap directly on an empty slot in the timeline for the worker and time you want. Either way, a panel opens asking you to choose an entity type.
If you plan to create a visit tied to a specific client, make sure that client is already added in People → Customers before you start. Client-linked visit types will ask you to select a client, and they will not appear in the picker unless they have been added first.
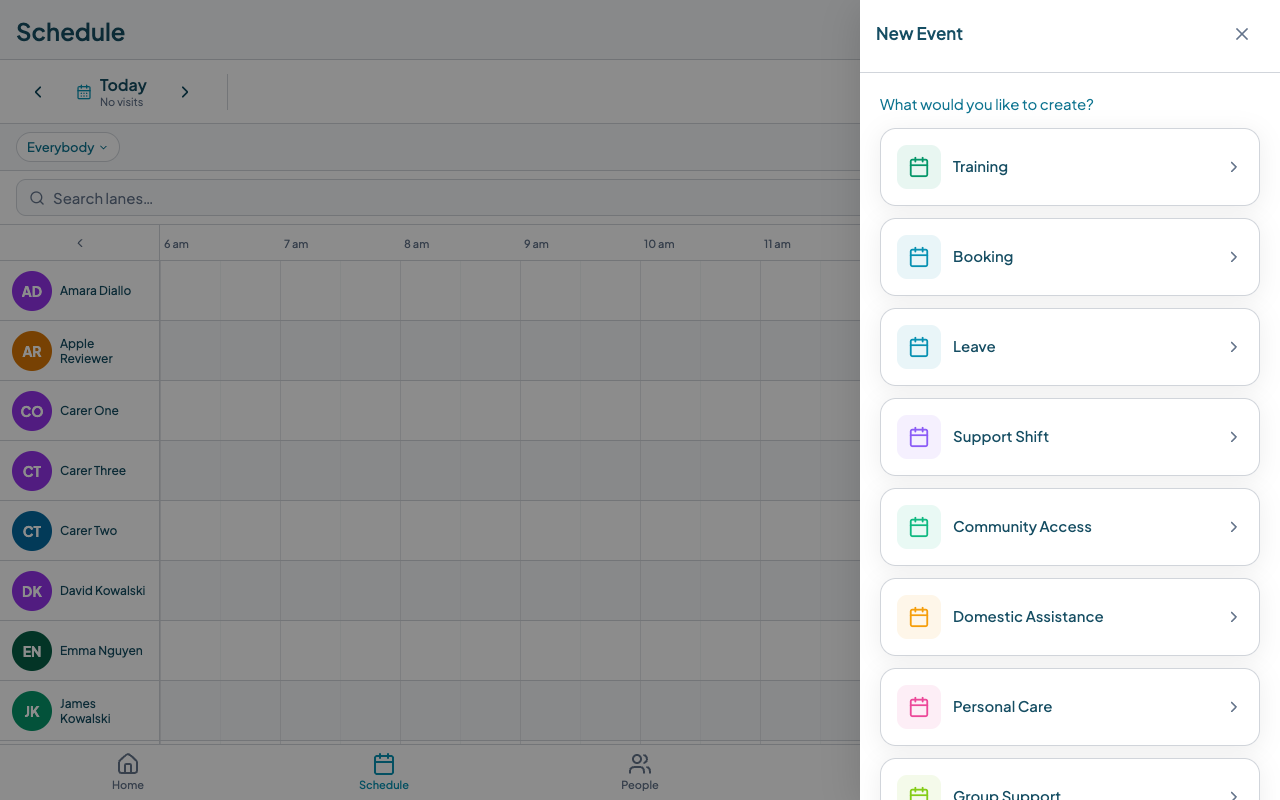
The entity type determines what kind of shift or event you are creating. The most common types for care providers are:
- Support Shift -- a general shift for a worker without a specific client attached, often used for support work where the client is assigned separately.
- Personal Care, Community Access, Domestic Assistance, Group Support -- specific support types tied to a client and a particular kind of service.
- Booking -- a general scheduled visit or appointment.
- Leave -- for recording worker leave so it shows on the scheduler board and is factored into coverage.
Select the type that fits the shift you are creating. The form that opens will ask for the details relevant to that type: client name, date and time, duration, location, and any notes. Fill in what you know and tap Save.
If you are not sure which type to use, start with Support Shift or Booking. You can refine your entity type setup once you have a feel for how the scheduler works. The goal right now is to get something on the board.
Step 5: Assign a worker to the shift
After creating a shift, open it and find the Assigned worker row. Tap it to open the assignment panel. You will see a list of your workers, sorted by their suitability for this shift.
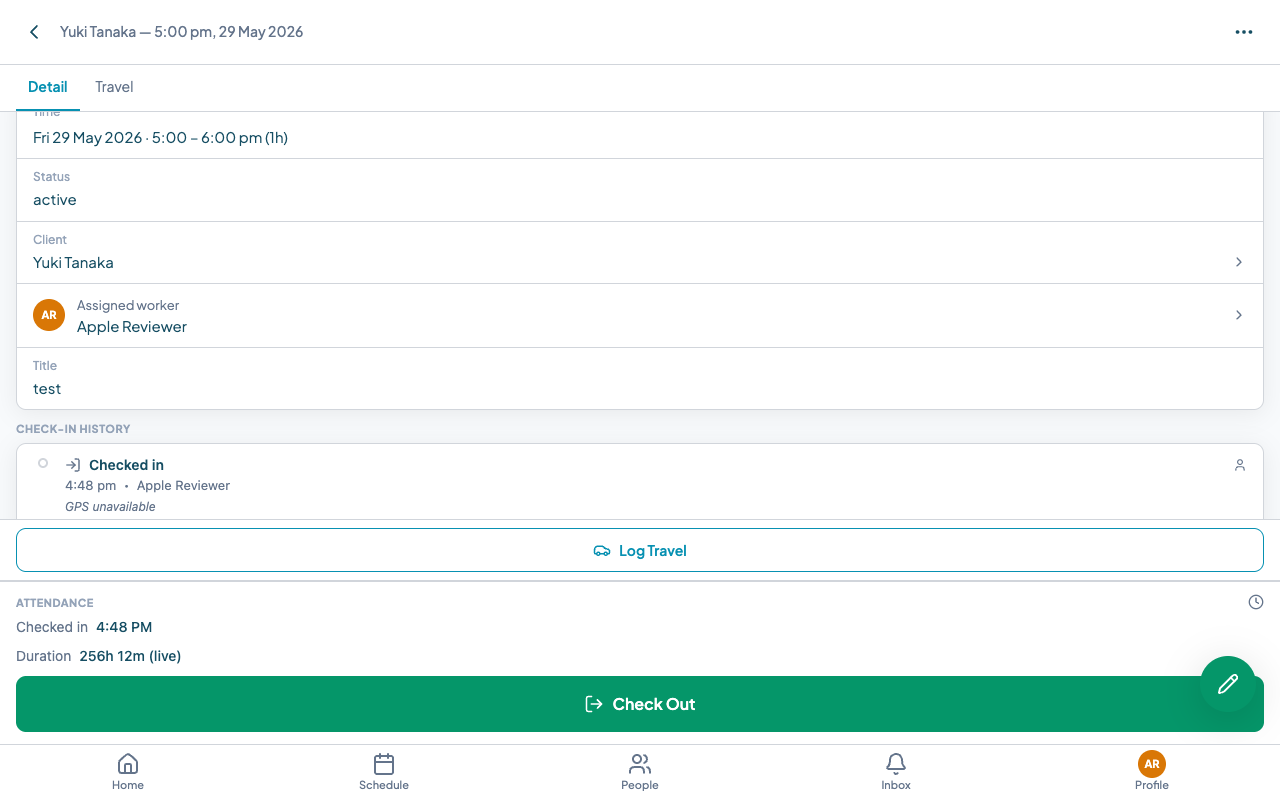
Workers are grouped into Eligible and Ineligible based on the qualifications required for the shift type. If the shift type has required qualifications configured and a worker is missing one, they will appear in the Ineligible section with the missing qualification noted. You can still assign them if needed, but the scheduler will flag it.
Once you have set up qualifications (covered in the compliance tutorial), you will see a small red dot on any shift block where the assigned worker does not hold all required qualifications. This means you can scan the entire week's roster and instantly spot coverage problems without opening individual shifts.
For now, assign whoever is available for the shift and move on. Qualification checking becomes more useful once you have entered your workers' actual certifications.
Step 6: Publish the roster
Building a roster in Teiro does not automatically notify your workers. Shifts are in a draft state until you publish them. This gives you time to finalise the schedule before anyone receives a notification.
When you are ready to send the roster to your team, tap Publish Roster on the scheduler board. A panel opens where you set the date range you want to publish.
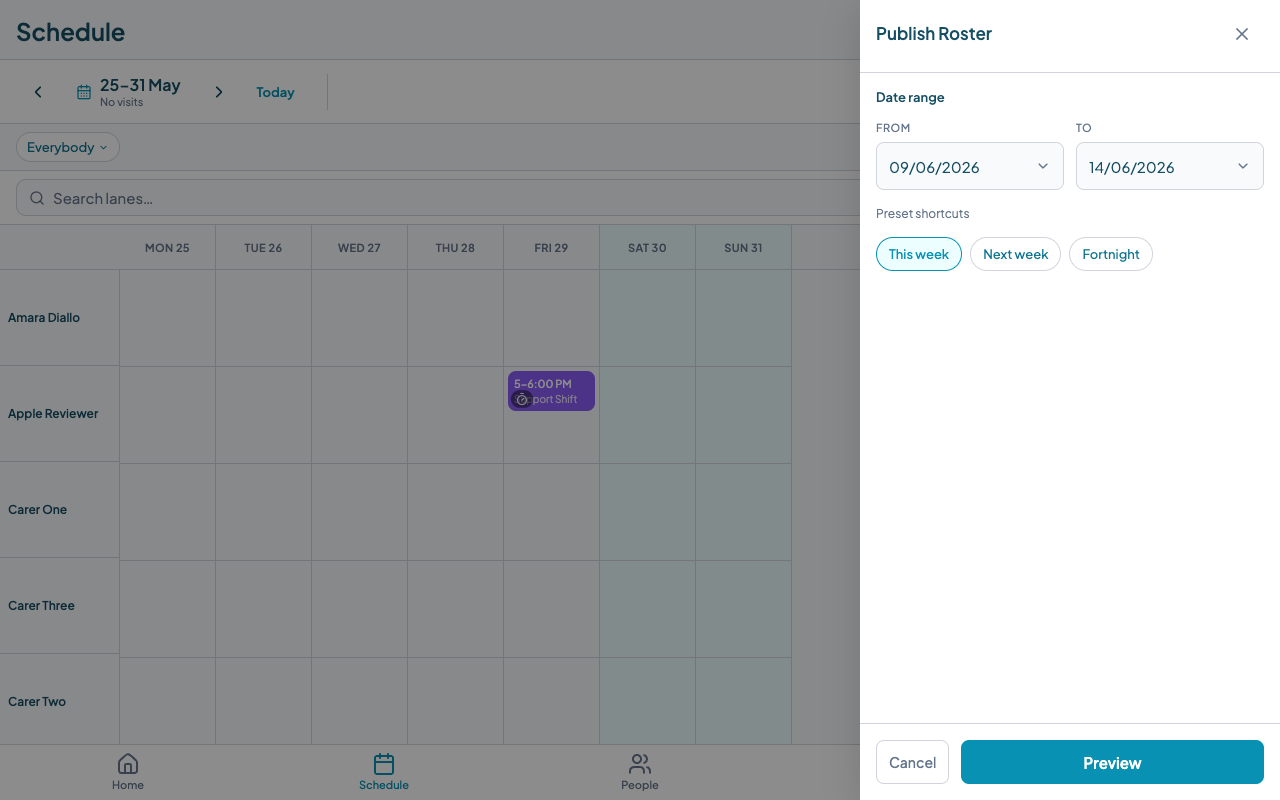
You can type dates directly or use the quick-select chips: This week, Next week, or Fortnight. Before confirming, tap Preview to see a summary of which shifts will be included and which workers will be notified.
When you publish, every worker with shifts in that date range receives a notification on their phone. They can then open the Teiro app, go to their Schedule tab, and see their roster for the period. Workers on the Carer role see only their own shifts. Coordinators and schedulers see the full board.
If you make changes to the roster after publishing, those changes are visible immediately to workers but do not trigger a new notification unless you publish again. For significant changes -- like adding or removing a shift -- it is good practice to republish so workers are explicitly notified.
What to do next
With your team added and your first roster published, you have the foundation in place. These articles cover the next steps:
- Using the scheduler board -- a deeper look at day and week view, shift tiles, and how to read the board efficiently.
- Running a qualification compliance report -- how to check which workers are missing qualifications and what needs to be renewed.
Ready to see it in action? Book a walkthrough with the Teiro team, or sign up and start for free -- free for organisations with five or fewer active users, no credit card required.
Related articles
Using the Scheduler Board
Navigate the drag-and-drop scheduling board to roster carers and manage your week.
How to run a qualification compliance report
Run the Qualification Compliance report to see every carer credential in one view -- who is compliant, who has an expiry coming up, and who has a gap.